How to create a course
To create a course in Rapid Induct for anyone to complete, follow the steps below:
Step 1: Log in to your MyRapid account and click ‘Enter’ into the relevant account
Step 2: Click ‘Courses’
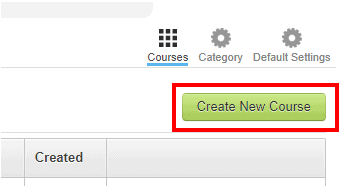
Step 3: Click ‘Create New Course’
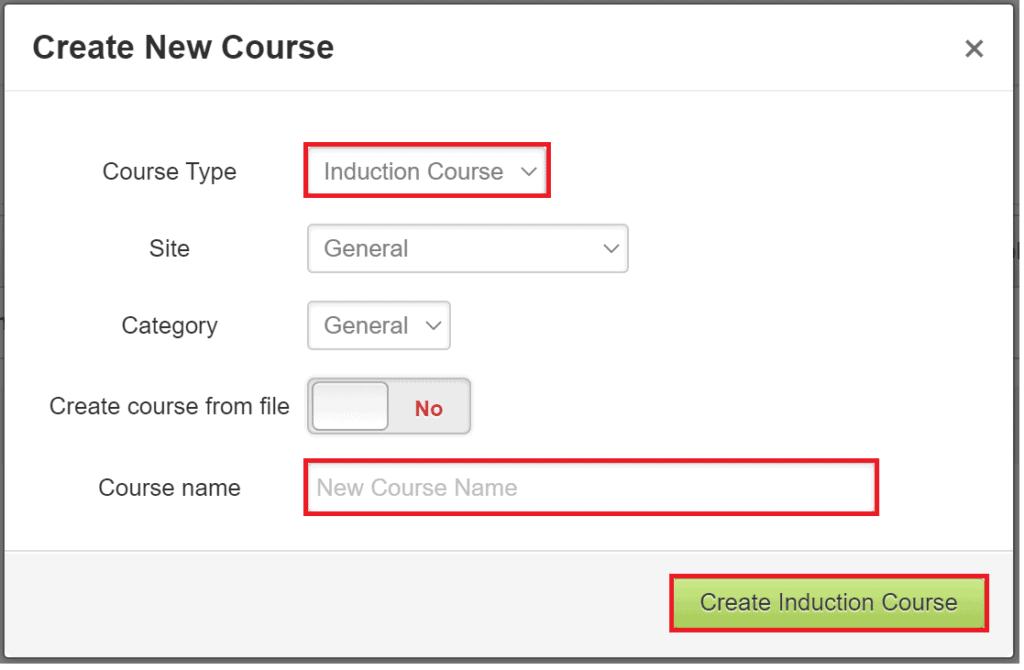
Step 4: Select the Course Type and enter the Course Name. Click ‘Create Induction Course’.
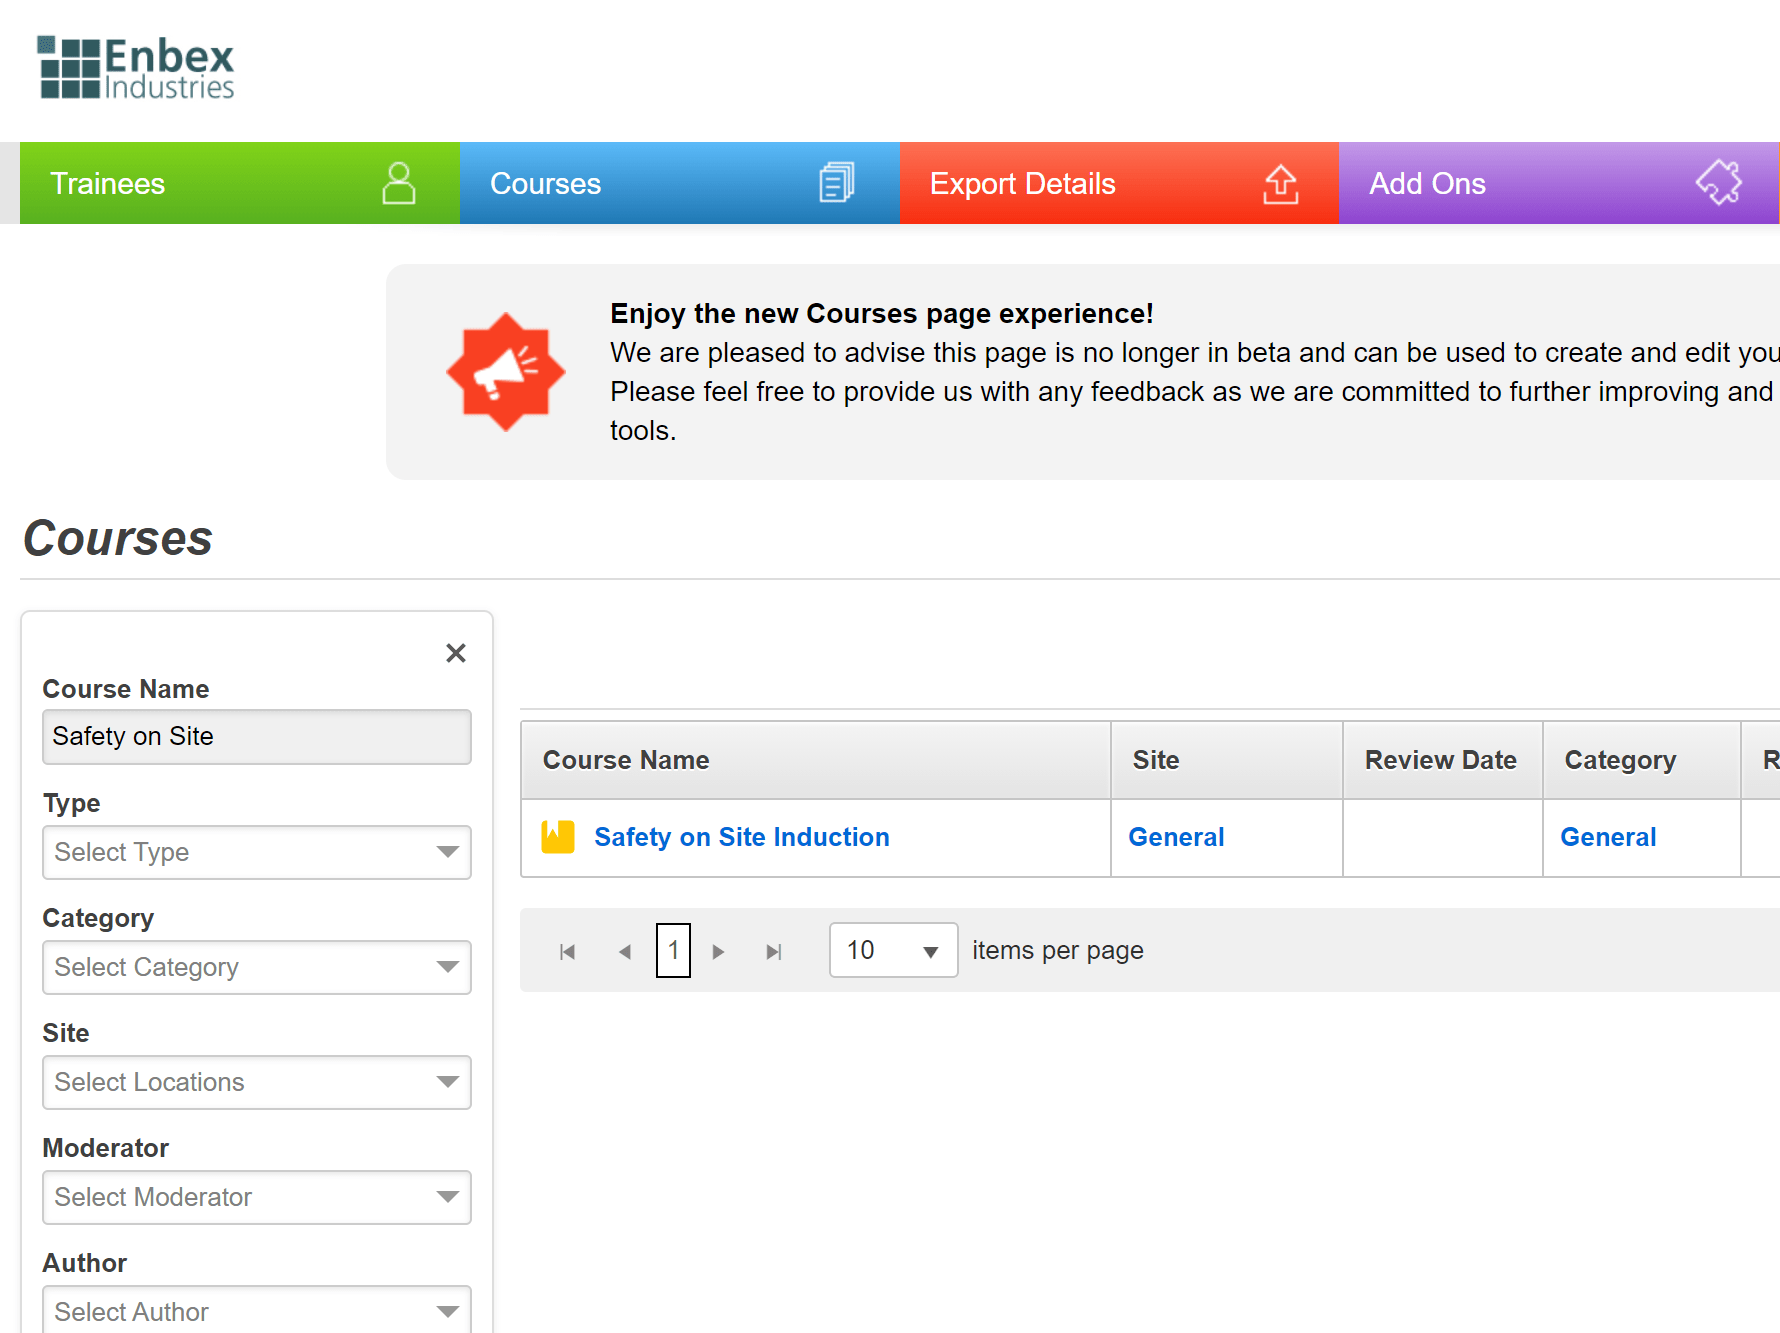
Step 5: The new course will appear in the list, this list is in alphabetical order. You can search under ‘Course Name’ or find it manually in the list. Click on the course name.
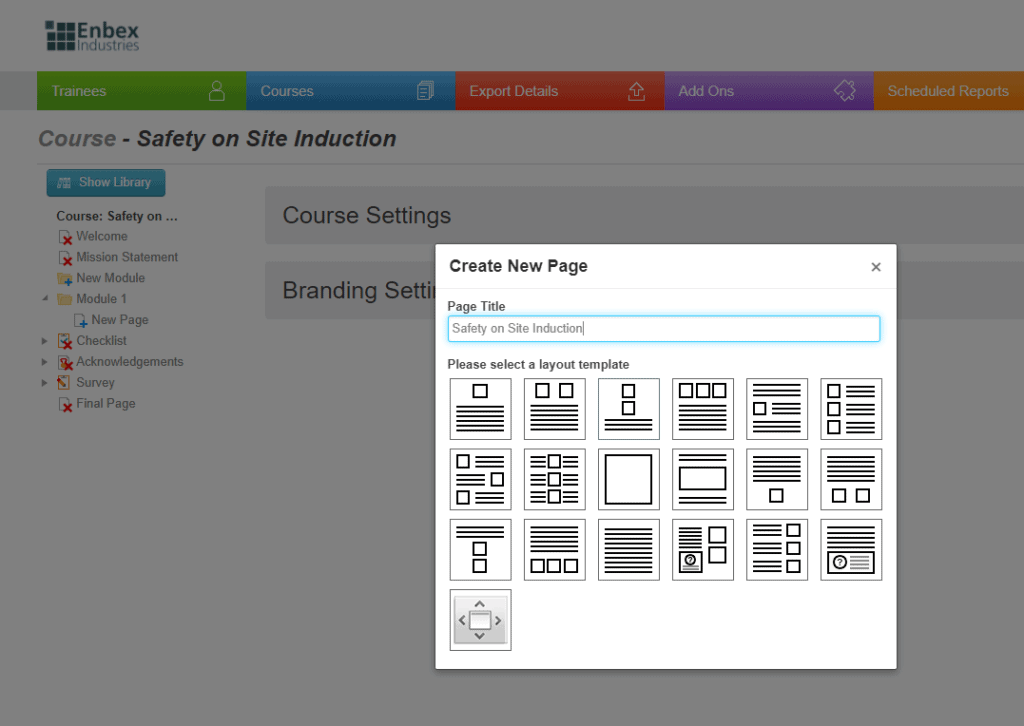
Step 6: This will open up a page where you can make changes to the overall course specifications (such as minimum pass mark and reinduction period). Click the ‘+’ icon next to ‘Module 1’ to begin creating the first page of your course, and click on ‘New Page’. Start by entering the ‘Page Title’ and then selecting a page template to get the layout format, with the squares demonstrating where images will be and the lines representing text.
Step 7: Once the template is chosen, click on the corresponding fields that appear to enter text and upload media.
Step 7A: If you wish to insert a page that has a full-screen video or image, select the grey box with four arrows (below right). If you want to include a question on that page, then click the box with the question mark (below left). An example of when you may like to include a question on the page is when you have created a case study and wish to incorporate a question on the same page underneath the study.

Step 7B: If you want to include a question related to the slide that will then appear at the end of the module, then click the arrow icon next to the page. This will open up a ‘Questions’ page, and from here you can add as many questions as you like.
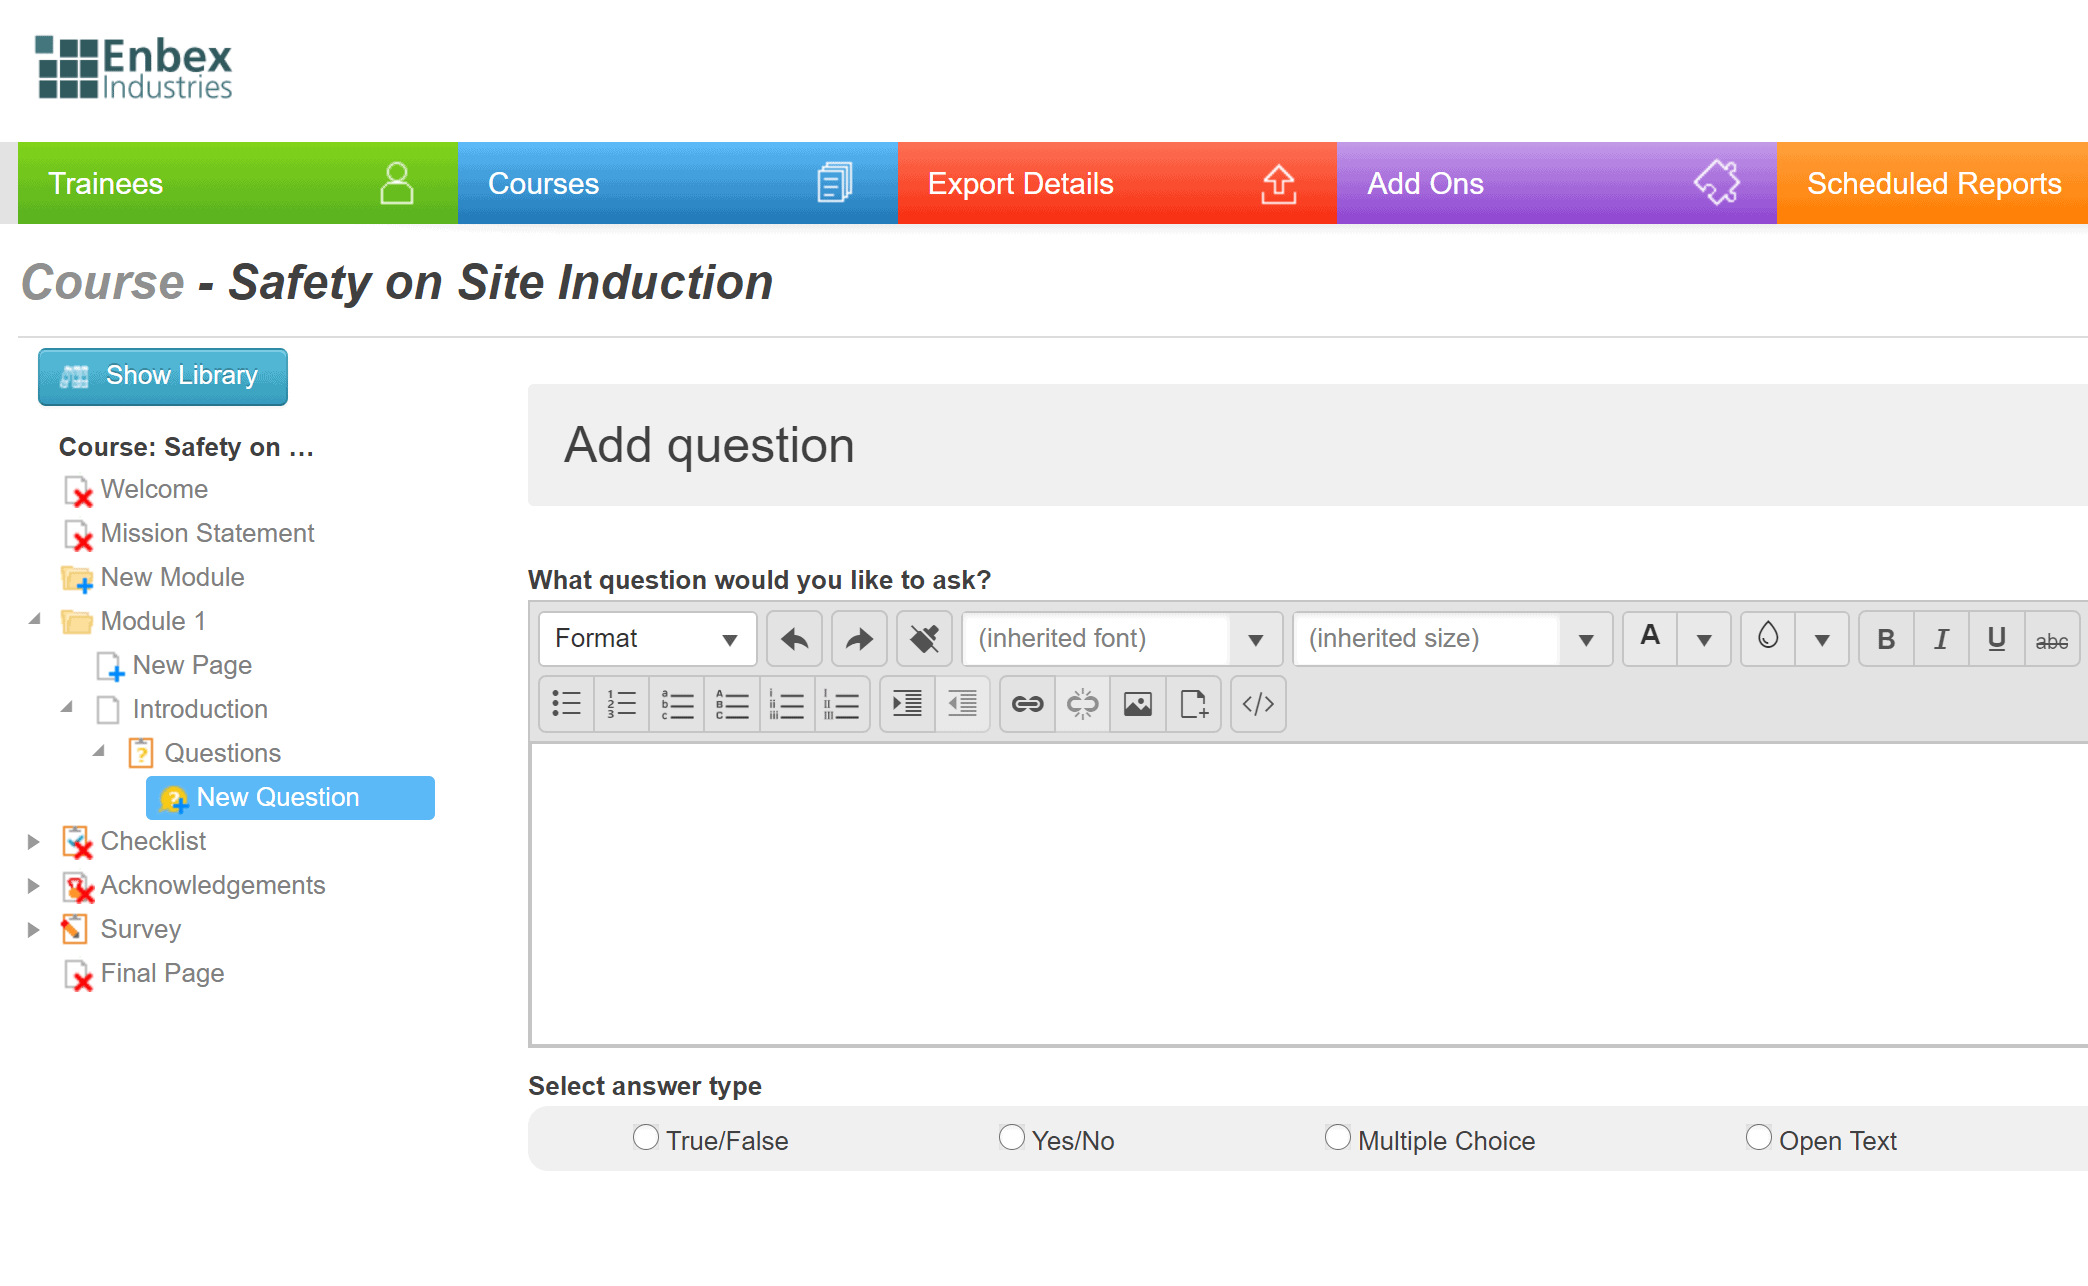
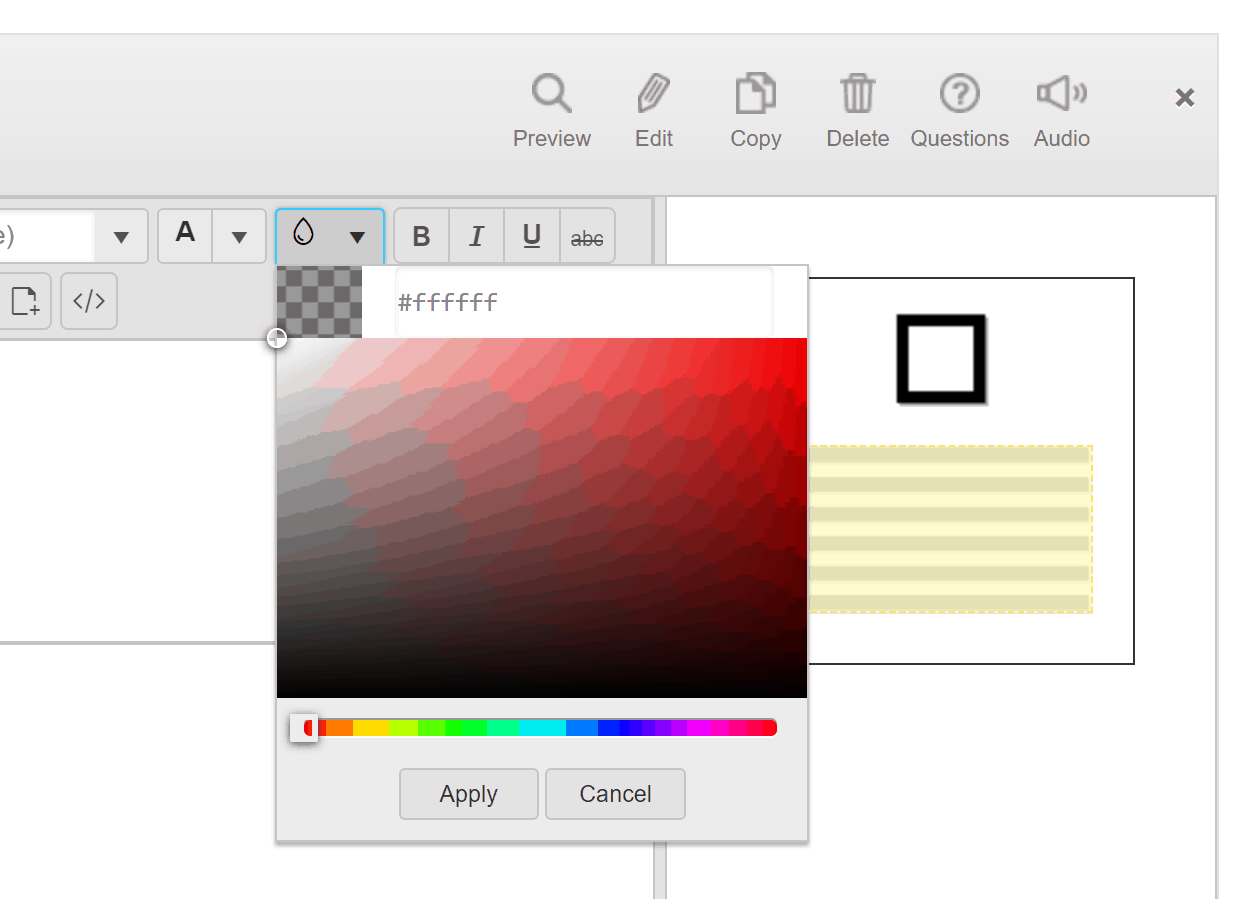
Step 8: To change the font colour, you can click on the ‘A’ icon in the toolbar. This will bring up a selection box where you can select the colour you wish to use. Here you can also use your company’s specific colours if desired by typing the correct code into the text field.
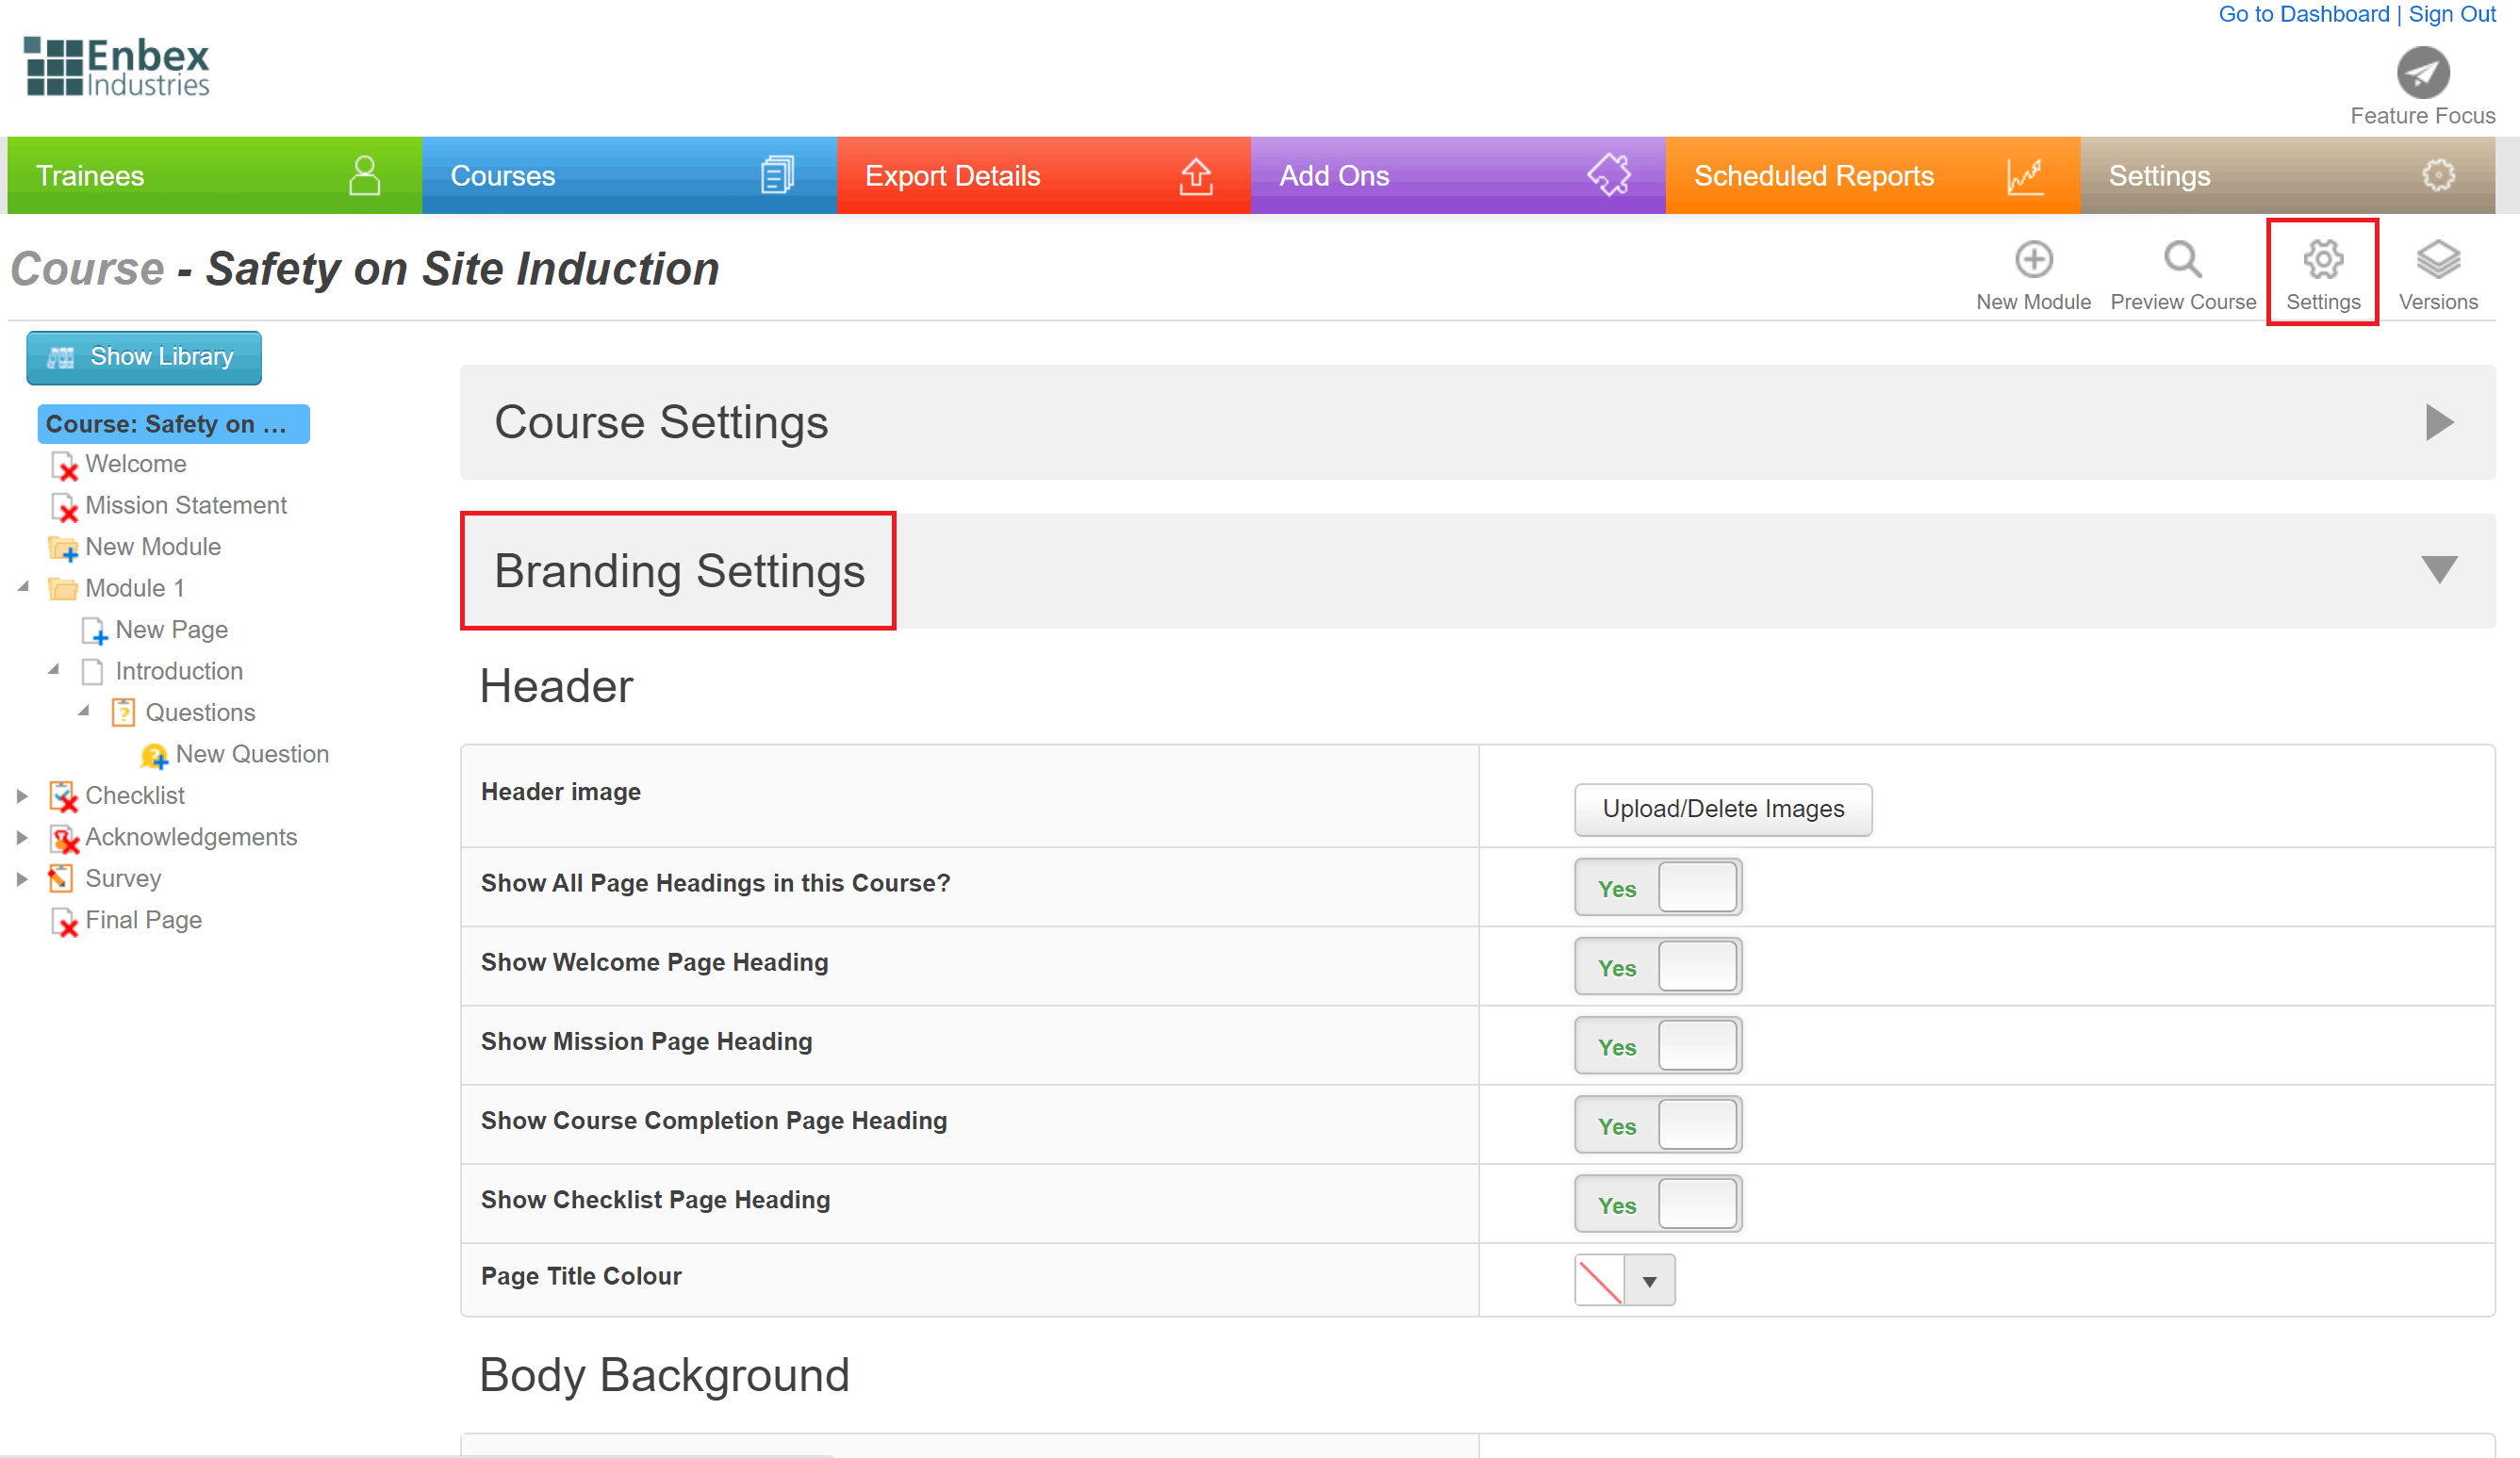
Step 9: To edit the branding and include your own header and background, you can navigate to the settings tab at the top right. Here you can drop down the ‘Branding Settings’ and add images for your header and background.
Step 10: To preview what a page will look like in the course, click on the page you wish to view, then select ‘Preview’. This will open the course in a new tab, showing you how it will appear.

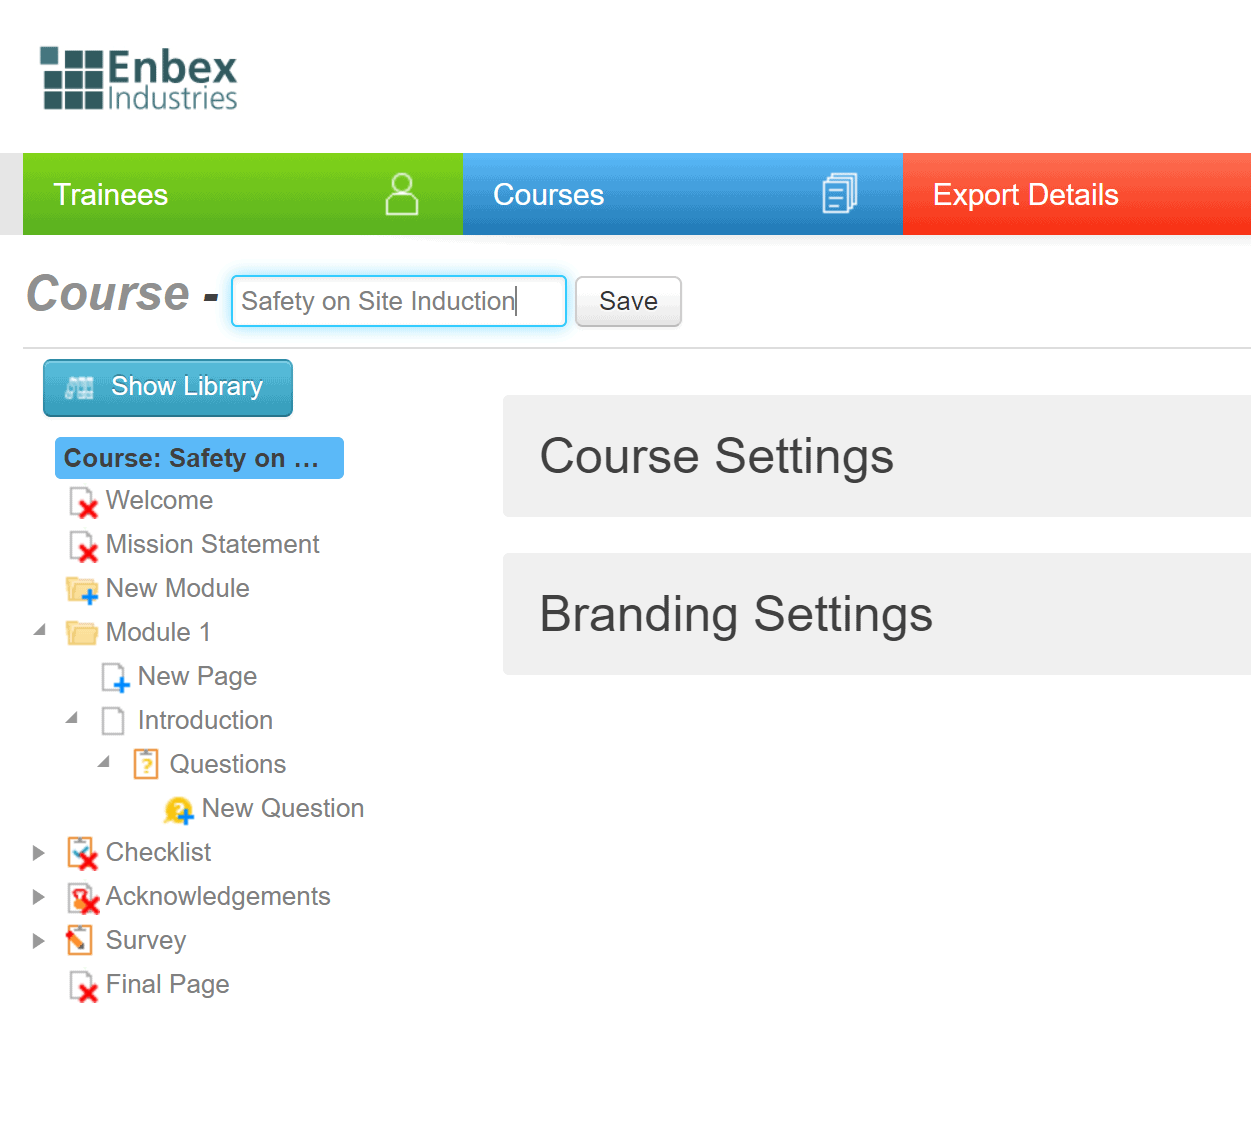
Step 11. To change the name of the course, click on the course name in bold. This will allow you to edit the field, simply click save once you have updated the course name.
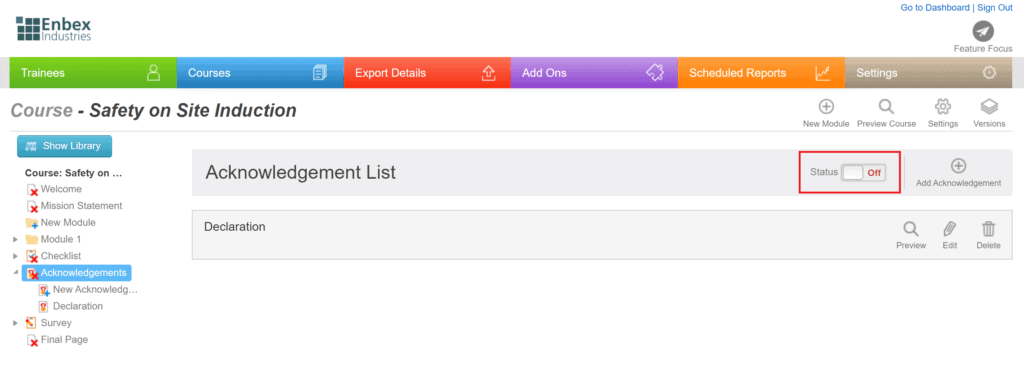
Step 12. You can add an ‘acknowledgement’ page to the end of the course to confirm that the person has completed the course themselves, agrees to abide by your company’s standards, and so on. To do this, simply click the arrow next to the ‘Acknowledgements’ tab and select ‘New Acknowledgement’. You also need to ensure you click the ‘Acknowledgements’ tab and select ‘Turn On’ to ensure the declaration displays in the course.
Step 13. To preview the entire course, click on ‘Preview Course’. This will open the course in a new page and allow you to click through to preview it.
